前回シンプルな四角い板を作ったので、今回はそれを応用して多角柱を作ってみる。
①図形の座標を計算する
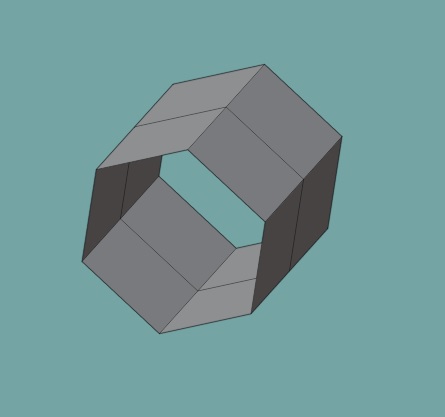
多角形を作り、セクションの数ぶん画面の奥に伸ばしていくイメージ。
ここでは六角形を2セクションぶんの奥行きで作ってみることにする。

  const sect = 2; //sectionの数
  const edge = 6; //edgeの数
  const size = 10; //1辺の長さ

  const pt = []; //座標を入れる配列
  for(let i=0; i<(sect+1); i++){
      pt[i] = [];
      let z = -size * i; //奥行き
          for(let j=0; j<edge; j++){
              let theta = j*2*Math.PI / edge;
              let x = size * Math.cos(theta);
              let y = size * Math.sin(theta);
              pt[i][j] = [x, y, z];
      }
  }
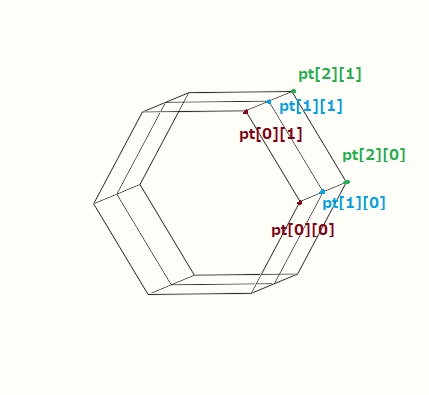
座標はptに下図のような順番で入る。(pt[2][0]以降は省略)
②verticesの作成
座標がこの順番のままだと面が貼れないので、四角のブロックごとに区切っていくように座標の順番を変えてverticesを作る。
  const vert = [];
  for(let i=0; i<sect; i++){
      vert[i] = [];
      for(let j=0; j<edge; j++){
          vert[i][j] = [];
          vert[i][j][0] = pt[i][j];
          vert[i][j][1] = pt[i][(j+1)%edge]; //edgeを一周回ったら0に戻る
          vert[i][j][2] = pt[i+1][(j+1)%edge];
          vert[i][j][3] = pt[i+1][j];
      }
  }
  const vertices = new Float32Array(vert.flat(3)); //1次元配列に変換
下図のような順番に座標の順番を整理した後でverticesを作成している。
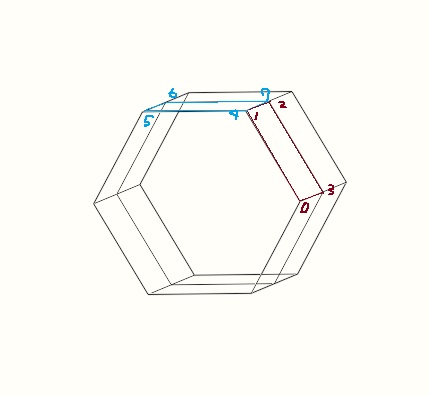
③indicesの作成
面を貼る順番が表側になるように(前回の記事参照)ひとつめの四角(0⇒3⇒2⇒2⇒1⇒0)ふたつめの四角(4⇒7⇒6⇒6⇒5⇒4)の要領で四角の数ぶんindexの順番を入れていく。
  const num_rect = sect * edge;
  const order = [0,3,2,2,1,0];
  const index = [];
  for(let i=0; i<num_rect; i++){
      for(let j=0; j<order.length; j++){
          indx.push(order[j]+(4*i));
    }
  }
  const indices = new Uint16Array(index);
④バッファーオブジェクトの作成
頂点座標とインデックスをアトリビュートするところは前回と一緒だが、さらにcomputeVertexNormals()で法線向きを計算してあげる必要がある。
 const geometry = new THREE.BufferGeometry();
  geometry.addAttribute('position', new THREE.BufferAttribute(vertices, 3));
  geometry.setIndex(new THREE.BufferAttribute(indices, 1));
  geometry.computeVertexNormals();
⑤メッシュを作成
あとは任意のマテリアルでメッシュを作成する。
結果が分かりやすいようにノーマルが色付けされるマテリアルを使って、ワイヤーフレーム表示させてみる。
  const material = new THREE.MeshNormalMaterial({
    side:THREE.DoubleSide, //面の裏側も表示する
    wireframe:true
  });
  const plane = new THREE.Mesh( geometry, material );

  scene.add( plane );
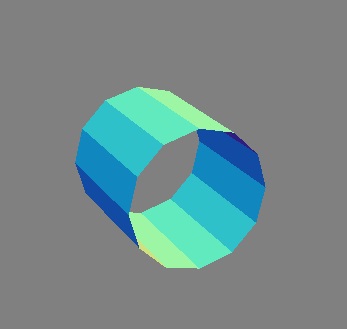
結果はこんな感じ。(正面からだと図形がわかりにくいのでカメラのポジションをちょっとずらしている)
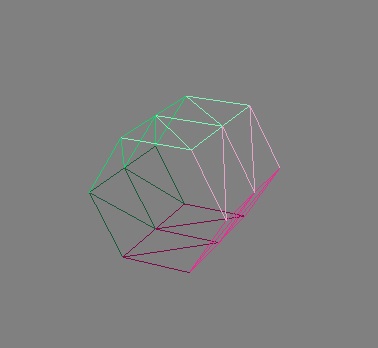
さらにedgeの数を増やせば円錐に近づく。(カメラ左から見るとノーマルの色が変わる)
「three.jsでカスタム図形を作る(2)」への1件のフィードバック
コメントは停止中です。